This is essentially what you learn when you are taking the PADI Dolpin Semi-closed rebreather course. If you have taken the course this may serve as a reminder or checklist. If you have not taken the course this might get you motivated to do so but this article is NOT a subsitute for the course.
Author unnoticed by leopard shark
Introduction The Dräger Dolphin is a semi-closed rebreather. A rebreather recycles the air you breath out instead of disposing it into the surrounding water. The result is a less noisy diving experience and a more economic use of breathing gas.
In order to be able to the reuse the air that you breath out you need to remove the carbon dioxide the body adds and add oxygen that the body consumes. To remove the carbon dioxide you breath thru a filter made out of soda-lime that converts the carbon dioxide to heat and a small amount of moisture. To add oxygen there is a constant flow of nitrox, air with added oxygen, that flows from a cylinder into the rebreather.
The nitrox flows out at a higher rate (5 to 15 liters per minute) than what the body consumes oxygen (1 to 2 liters per minute) which will add volume to the rebreather. When the rebreather reaches a certain size (and pressure) an over pressure valve will let some of the air out of the system. The fact that some air is let out into the water is why the rebreather is called semi-closed.
It would be possible to use a closed system with pure 100% oxygen but oxygen is dangerous under pressure and would limit the use of the rebreather to approximately 6 meters depth. There are military rebreathers used by combat divers that work this way for example the Dräger LAR V.
The course is diveded into a theoretical part and a practical part. In the theoretical part you will learn how the unit works and how to plan your dive. In the practical part you will learn how to assemble the unit, how to test that it works as expected and do a couple of dives using the unit.
How the system works The picture below shows how the gas flows in the system. The gas initially comes from the tank thru the constant mass flow valve and if needed thru the demand valve and goes into the inhalation bag. From the inhalation bag the diver inhales oxygen enriched air thru the loop and exhales carbon dioxide enriched air into the exhalation bag. If the system is filled up with gas some gas will leave the rebreather thru the over pressure valve since more gas is added to the system than the user consumes. The gas that is recirculated will go into the scrubber canister where the carbon dioxide is removed and come out as clean nitrox into the inhalation bag.
The unit ready for diving
What the unit looks like above surface The front view mainly shows the BCD with inflation hose and integrated weight pockets marked with red stripes.
Front view
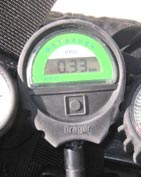
The back view shows clockwise from top: yellow bailout cylinder, black breathing loop hose, blue nitrox cylinder, black nitrox pressure gauge, green bailout regulator, yellow depth meter and bailout pressure gauge.
Back view
What the unit is like below surface Diving with a rebreather is somewhat different from diving with regular scuba equipment. The main difference you will notice is that it is much harder to maintain a stable buoyancy since you can not affect your buoyancy by breathing in and out as you are used to with open circuit equipment. You will also note minor differences such as it is less noisy, the air you are breathing tastes different and the mouth piece feels different in your mouth.
Your attention will be much more focused on your current depth. One reason for this is to make sure you avoid oxygen intoxination but also that maintaining a stable depth makes the buoyancy problem less severe. There are also a few other tricks you can use to help you with buoyancy:
To float: Use inflator button on BCD - the obvious way to float but it consumes your bailout air Take a very deep breath - this will empty the breathing bag and trigger the valve to let more Nitrox from the cylinder into the bag.
To sink: Use outlet button on BCD - the obvious way to sink Breath out through your nose - the breathing bag will temporarely loose air and you will sink. Breath out all air from your lungs - this will trigger the overpressure valve in the breathing bag and you will temporarely sink. Push your shoulders forward - this will also trigger the overpressure valve in the breathing bag and you will temporarely sink (thanks to Dan Mehlqvist for the tip).
To keep stable: Swim towards your goal depth - slightly upwards or downwards when you are a few dm off depth. Swim around obstacles instead of over or under them.
OXYgauge OXYgauge meassures the partial pressure of oxygen in the breathing bag and is an optional accessory to the basic Dolphin unit. It is very nice to be able to monitor what otherwise can only be calculated approximately. If you are using an OXYgauge then it is important to make sure that it actually is well calibrated. There is a build in auto calibration that you can use. You can also make sure that it shows 0.21 in air and the insert it into the breathing bag, purging the bag and make sure that the OXYgauge shows the same value as when you analyzed your gas. Basically if you analyzed gas to 61% oxygen then OXYgauge should show 0.61. Personally I still treat the OXYgauge with some suspicion after using a few not 100% reliable units. I think that a OXYgauge is to the diver what a GPS is to a map and compass: A nice solution most of the time but I wouldn't use it without backup. Backup in this case is your MOD (maximum operating depth) calculation and depth gauge.
To operate: Turn on: 2 presses on button + 2 presses to confirm when On flashes on the screen Turn off: 3 presses on button + 2 presses to confirm when Off flashes on the screen Self calibrate: 6 presses on button + 2 presses to confirm
OXYgauge close-up
Rebreather with OXYgauge fitted
Step by step throughout the dive
Plan dive - Calculate your MOD (maximum operating depth) based on what depth you reach a oxygen partial pressure of 1.4 bar. This will prevent you from experiencing CNS (oxygen intoxination). - Calculate your nitrogen exposure by calculating the percentage of nitrogen in the breathing bag. This will prevent you from experiencing DCS (decompression sickness).
Before diving - Check cylinder oxygen percentage with oxygen meter. Recalculate maximum depth if oxygen percentage is more than 1 % above anticipiated percentage. Recalculate nitrogen exposure time if oxygen percentage is more than 1 % below anticipiated percentage. - Fill scrubber canister with Dräger DiveSorb scrubber - Insert small exhalation bag on top to the red left hole. - Insert big inhalation bag on top to the left black right hole + overpressure valve in the top middle. Set overpressure valve to middle setting. Clockwise will close it -> larger breathing bag. - Insert scrubber canister and fasten it loosely with velcro strap (will be warm and expand). - OXYgauge: Turn on OXYgauge and wait until it shows 21% then insert on back of inhalation bag. - Attach nitrox cylinder and attach first stage to it. Put second stage close to inhalation bag opening.. - Grab loop and test the valves by blowing and sucking into it and attach it on top of the unit. - Attach high pressure hose to the jet you calculated to use - Flowrate check - put the Dräger flowrate meter onto the regulator to make sure gas flows at the right rate. - Attach second stage to inhalation bag. - Overpressure check - let the gas fill the bag and then turn it off. Wait until gauge shows 0 bar and then put 2 kg weight on bag and make sure no leaks let air out during 30 seconds. - Underpressure check - suck out all air in system and squeeze the breathing loop and make sure no leaks let air in during 30 seconds. - Close the unit with the velcro straps and make sure the second stage is not uncomfortable sticking into your back. - Make sure that the gas and the OXYgauge are turned off until you are ready to dive.
Scrubber
Open system with regulator and jets visible
Before entering the water The 3G check: - Turn on Gas - Check Gauge to see that you have pressure - Put Gag in mouth, open it and breath
Gas
Gauge
Gag
Descent The bubble check - stop at 5 meters depth and let buddy check that there are no visible leaks.
While diving in emergency Bailout procedure: - Find bailout regulator - Breath in - Close mouthpiece - Swap to bailout regulator
To go back to rebreather: - Reach above head and grab the loop - Take deep breath - Swap to rebreather loop without opening the mouthpiece - Blow the mouthpiece free from water - Open mouthpiece and breathe - Attach bailout regulator to BCD
Close gag
Switch over to bailout system
Ascent Purge breathing bag - take three deep breaths and exhale through your nose to force fresh nitrox into breathing bag. If you don't do this the partial pressure of the oxygen in the breathing may drop below the life supporting limit and you may suffer from shallow water blackout and drown. Do this before ascending. Stop at the normal 5 meter ascent safety stop for 3 minutes and purge the bag again.
After diving Dispose scrubber. Clean the entire rebreather in fresh water. Disinfect the hose and breathing bags in mouth wash in order to kill of bacteria.
Summary of most important things to remember Don't go deeper than planned - you will suffer from Hyperoxia which shows up as a very short moment of tunnel vision, nausea and dizziness then unconsciousness and drowning. Make sure the gas is turned on - you will suffer Hypoxia which shows up as a very short moment of breathlessness and then unconsciousness and drowning. You will not be warned by the urge to breath since that is caused by build up of carbon dioxide which won't occur in a rebreather since the scrubber removes all carbon dioxide. Make sure you don't run out of gas - you will suffer Hypoxia with same symptoms as above. Purge bag before ascending - you will suffer Hypoxia with same symptoms as above.